Fold3 HQ

Grant Appointed General-in-Chief of Union Army: March 9, 1864

March 1, 2017 by | 23 Comments

Fold3 Image - Ulysses S. Grant service record
On March 9, 1864, Ulysses S. Grant was promoted to lieutenant general and made general-in-chief of the Union armies. In this position, Grant would ultimately prove the general most responsible for the Union victory in the Civil War.

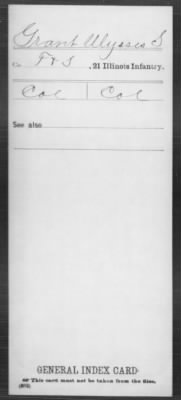
After the outbreak of the Civil War, Grant—who had previously served in the army—rejoined as the colonel of an Illinois volunteer regiment. He received steady promotions until attaining the rank of major general (in the regular army) in command of the Military Division of Mississippi. Meanwhile, he had likewise been gaining recognition for his capture of Forts Henry and Donelson and victories at Vicksburg, Chattanooga, and others.

Grant’s successes led to the introduction of legislation in Congress to revive the rank of lieutenant general (last held by George Washington) so that Grant could be awarded that rank and thus gain command of the entire Union Army. President Lincoln, who had never met Grant but was unhappy with the performance of the previous commanding generals, also threw his weight behind the bill, and it passed and was signed into law in late February 1864.

Grant’s name was shortly thereafter submitted to the Senate for confirmation and his commission was signed by the president. Grant was in Tennessee when he received word of his pending promotion to lieutenant general, and he traveled to Washington DC in early March to accept his new commission. He met President Lincoln for the first time on the 8th at a reception at the White House, and then the following day, March 9th, he returned to the White House for an acceptance ceremony.

Grant's headquarters attached to Army of the Potomac
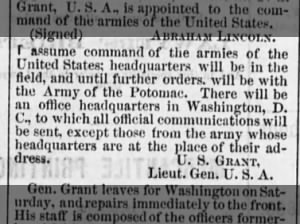
President Lincoln wanted a commanding general who would take initiative and responsibility and act independently, freeing Lincoln from having to make military decisions. Grant was happy to oblige. He quickly put his senior command in place and set his basic strategy. Rather than commanding from the capital, Grant decided he would command from the field—attaching his headquarters to the Army of the Potomac—and commenced a course of action based on attrition.

Though Grant’s path to victory was far from easy—and his detractors would accuse him of being a butcher for his heavy casualties—he successfully destroyed the Confederates’ ability to fight and kept their armies on the defensive, ensuring the eventual success of Union forces and the preservation of a unified nation.

Learn more about Ulysses S. Grant by searching Fold3.

UK, Navy Lists

February 24, 2017 by | 8 Comments

Fold3 Image - Example of a UK, Navy List page
Do you have an ancestor or other family member who served as an officer with the British Royal Navy between 1888 and 1970? Come explore the UK, Navy Lists on Fold3! In addition to including officers of the Royal Navy, the lists also include information on officers of the Royal Marines, Queen Alexandra’s Royal Nursing Service, Coast Guard, and other naval entities.

The Navy Lists began publication in 1819 and provide information on people who were serving as either commissioned or warrant officers in various naval services. Fold3’s UK, Navy Lists collection contains Navy Lists published between 1888 and 1970. Though not every year between these dates is available, the majority of them are.

The Navy Lists contain basic information on officers, including name, where they were serving, rank, date of seniority, and (in later editions) specialization. The information within the Navy Lists is grouped in a variety of ways, such as alphabetically by officer’s surname, by rank (further broken down by date of seniority), and by ship or station. There are also lists of pensioners and retired officers, as well as lists of officers in the reserves.

In addition to information about officers, the Navy Lists also include a variety of other details about the Royal Navy. This information varies from year to year but may include regulations, members of boards, and vessels for sale. There may also be lists of clerks, schoolmasters, civilian dental surgeons, warrant writers, warrant armorers, head schoolmasters, head stewards, and others.

And here’s a tip: If you’ve found an ancestor in one year’s edition of the Navy Lists, try searching for that person across multiple years’ worth of Navy Lists. Keeping track of their commissions, promotions, and stations over the years will help you gain a more complete understanding of their naval career and what their experience was like.

Do you have an ancestor who appears in the UK, Navy Lists? Tell us about them! Or get started searching the UK, Navy Lists on Fold3.


Battle of Manila Begins: February 3, 1945

February 1, 2017 by | 137 Comments

Fold3 Image - Corregidor, guardian of the entrance to the harbor at Manila, is bombed by the Consolidated B-24 Liberators of the 7th AAF.
On February 3, 1945, American forces entered the outskirts of Manila, capital of the Philippines, beginning the Battle of Manila, a ferocious and destructive urban battle against the Japanese that would leave Manila the second-hardest hit Allied capital (following Warsaw) of World War II.

As part of his campaign to retake the Philippines from the Japanese (who had captured it from the Americans in 1942), General Douglas MacArthur first invaded the island of Leyte and then moved on to the island of Luzon, the largest of the Philippine islands and home to the capital, Manila.

American troops were able to rapidly advance to Manila, leading MacArthur to believe it would be a relatively easy fight. They entered the city limits on February 3, quickly liberating Allied (mostly American) POWs and civilians from their incarceration at the University of Santo Tomas and Bilibid Prison. However, Japanese forces dug in and put up a fierce fight in the city, forcing the Americans and their Filipino allies into a challenging urban battle, in which they fought block by block, building by building, and floor by floor, frequently hand-to-hand.

Eventually, over the course of the month, the Americans and Filipinos were able to capture much of the city as well as the island of Corregidor, in Manila Bay. However, Japanese remained within a walled portion of Manila, called Intramuros. MacArthur denied the use of air support out of concern for the civilian population, so the Americans used heavy artillery instead, pounding the walls until they were breached and then fighting to clear the area of Japanese.

Fold3 Image - Bomb damage at Manila, Philippine Islands
Finally, by March 3, Manila had fallen and MacArthur had turned the city over to the Filipino government. But the victory was not without great cost. In addition to the 1,000 Americans and 16,000 Japanese estimated to have been killed, it’s believed that at least 100,000 Filipino civilians were killed during the battle. Many were brutally murdered by the Japanese, others were killed in fires that swept through portions of the city, and still more were killed as an unintended consequence of the American attack (particularly the artillery fire). In all, 80 percent of the southern residential district, 75 percent of factories, and all of the business district were destroyed, as were numerous governmental, educational, cultural, commercial, financial, and religious buildings.

Despite the horrors of Manila, the battle for Luzon was not yet over. In fact, a portion of MacArthur’s forces would remain fighting in Luzon for the remainder of the war.

Do you have any family member who fought in the Battle of Manila? Tell us about them. Or learn more about the battle by searching Fold3.

WWII Paratroopers

January 18, 2017 by | 237 Comments

Fold3 Image - Paratrooper's equipment being inspected before leaving on invasion of Europe. Somewhere in England.
The Allied commanders of World War II saw the need for airborne troops in Europe during the German invasion of Crete in May 1941. Although German paratroopers nearly met with disaster, they eventually succeeded in taking the island. The German attack was the first time an invasion of an island was successfully accomplished by air, and though the near failure made the German high command wary of relying much on paratroopers, the Allies saw the advantages and began training their own airborne forces.

Paratroopers were valuable because they allowed the Allies to drop light infantry behind enemy lines, enabling them to deploy a fighting force without warning. Two of the most active of the American airborne divisions were the 82nd and 101st, though there were others, including the 17th, 11th, and 13th. American airborne troops fought in battles in places such as North Africa, Normandy, the Netherlands, Sicily, the Philippines, and elsewhere.

Fold3 has many records relating to the airborne troops of World War II, including numerous photos in the WWII U.S. Air Force Photos collection. Below are just a few of the photos you can find on Fold3 of paratroopers in World War II:

Do you have any family members who were paratroopers? Tell us about them! Or find more images and documents about the paratroopers of World War II by searching Fold3.

Battle of Cowpens: January 17, 1781

January 1, 2017 by | 290 Comments

The troops I have the honor to command have gained a complete victory over a detachment from the British Army, commanded by Lt. Colonel Tarleton. the Action happened on the 17th inst. about sunrise at a place called the Cowpens...
In the early morning of January 17, 1781, in South Carolina, American troops under Brigadier General Daniel Morgan defeated a force under British Lieutenant Colonel Banastre Tarleton in one of the more decisive victories for the Americans in the south during the Revolutionary War

In late 1780, the American commander-in-chief of the southern theater, Nathanael Greene, made the daring decision to split his already limited number of troops in the face of a superior force under British Lieutenant General Charles Cornwallis. Accordingly, part of Greene’s force was given to Daniel Morgan. The British saw Morgan’s troops as a threat to some crucial posts, so Cornwallis sent troops under up-and-coming commander Banastre Tarleton to take on Morgan.

When word reached Morgan of Tarleton’s approach, he decided to face his enemy in a cow pasture called Cowpens rather than risk being overrun while trying to cross the Broad River. Knowing Tarleton favored frontal attacks, Morgan deployed his infantry troops into three lines—meant to exhaust the energy and resources of the British—with his dragoons positioned in reserve behind the third line.

When Tarleton’s men arrived, they were met by fire from riflemen in Morgan’s first line, who after a few shots withdrew to join the second line, composed of militia. Morgan had instructed the militia to fire two volleys at the approaching British and then retire, which they did. Seeing the American militia appearing to flee, Tarleton sent dragoons after them, but they were met by the American dragoons, led by Lieutenant Colonel William Washington.

The British infantry had been stunned by the fire from the American’s first two lines and now faced the third line, predominately composed of experienced Continental troops overseen by Lieutenant Colonel John Howard. Meanwhile, Tarleton sent his reserve infantry and additional dragoons to try to outflank their opponents on the Americans’ right. The Americans on that side were commanded to turn to face the British, but the order was misunderstood, and they instead began marching to the rear, triggering a retreat in neighboring parts of the line. The confusion was corrected, however, and they turned to face the British in time. Those Americans were joined in the fight by the militia of the first and second lines, who had circled around the back of the American position.

Morgan‘s near-genius plan worked, and the Americans decimated the British. Although the two forces were relatively evenly matched, with roughly 1,000 men each, the British sustained 110 killed and 830 captured or wounded, while the Americans had 12 killed and 61 wounded. The battle wiped out nearly all of Tarleton’s force, striking a serious blow to Cornwallis’s army.

Did you have an ancestor who fought in the Battle of Cowpens? Tell us about them! Or learn more about the battle on Fold3.

Find: WWII Underwater Demolition Teams

December 13, 2016 by | 74 Comments

Fold3 Image - Explanation of the work of Underwater Demolition Teams
Before there were the Navy SEALs, there were the Underwater Demolition Teams (UDTs) of World War II in the Pacific. UDTs were in charge of reconnaissance of the shoreline prior to an amphibious invasion. They would reconnoiter the lay of the beaches and offshore waters and be on the lookout for any natural or manmade obstructions that would hinder landing craft. They would then use explosives to demolish any obstacles.

Although the UDTs were preceded by the Navy Scouts and Raiders and the Naval Combat Demolition Units (NCDUs) in the European Theater, the need for a Pacific equivalent became obvious during the invasion at Tarawa in November 1943, when Marines became stranded on reefs that aerial reconnaissance had misjudged to be deep enough for landing craft. The Marines were forced to wade a thousand yards to shore, and some drowned and others were killed by enemy fire. This established the necessity of human surveillance of the shore waters before an invasion.

In the early days of the UDTs, members worked in the water in full fatigues and shoes, but real-world battle conditions showed the need for a greater emphasis on swimming, and UDT members began to wear swim trunks and fins, becoming the Navy’s elite combat swimmers. The 34 teams were involved in amphibious invasions across the Pacific, including in Saipan, Tinian, the Philippines, Iwo Jima, Guam, and Okinawa—just to name a few.

You can find thousands of mentions of UDTs on Fold3, especially in the WWII War Diaries. Below are examples of just a few of the types of information you can find about UDTs on Fold3:

Do you have any family members who served on an Underwater Demolition Team? Tell us about them! Or search for more info on UDTs on Fold3.

The USS Arizona Sinks During the Attack on Pearl Harbor:
December 7, 1941

December 2, 2016 by | 49 Comments

Pearl Harbor, USS Arizona Today, and Dec 7, 1941
On the morning of December 7, 1941, the Japanese attacked the U.S. Pacific Fleet at Pearl Harbor, Hawaii. In this surprise attack, which would lead America to enter World War II, 6 U.S. ships were sunk and more than a dozen others were damaged. 2,403 American servicemen lost their lives, and another 1,178 were injured. The ship with the most lives lost was the battleship USS Arizona, with 1,177 deaths.

Below are excerpted accounts from that day by men who were on the Arizona and experienced its destruction firsthand. The full accounts, and others, can be found in Fold3’s WWII War Diaries collection.

“It was just before colors, in fact, I had already sent the messenger down to make the 8 o’clock reports to the Captain. Then I heard a dive bomber attack from overhead. I looked through my spyglass and saw the red dots on the wings. That made me wonder, but I still couldn’t believe it until I saw some bombs falling.” —Ensign H. D. Davison

“The worst explosion filled the inboard end of the room with flame and left a residue of orange smoke which continued to vent out the port. By this time the ship was down by the bow and sinking so rapidly that the lines from the ship to the after key were snapping. […] The ship was still sinking rapidly and oil was burning on the water and spreading aft. Because of the damage received there was no pressure on the fire main with which to fight the fire.” —Ensign A. R. Schubert

“I noticed No. 3 gun wasn’t firing due to safety bearing when the foot firing mechanism cut out. I was then shocked and surrounded by smoke and flames. I was backing away from the smoke and I can’t remember much from then on. I was in the water and was helped in a boat and from there to a hospital.” —Chief Gunner’s Mate J. A. Doherty

“Ensign Davison and myself got three boats clear of the oil fire on the water and picked up the men in the water who had jumped to get clear of the fire. We took several boatloads of badly burned and injured men to Ford Island landing and continued picking up men in the water between the ship and the shore.” —Ensign W. J. Bush

“About 0900, seeing that all guns of the antiaircraft and secondary battery were out of action and that the ship could not possibly be saved, I ordered all hands to abandon ship. […] I cannot single out any one individual who stood out in acts of heroism above the others, as all of the personnel under my supervision conducted themselves with the greatest heroism and bravery.” —Lt. Commander S. Q. Fuqua

Learn more about the attack on Pearl Harbor from Fold3’s World War II collection. Or visit Fold3’s Interactive USS Arizona Memorial to learn more about the servicemen who perished on the Arizona.